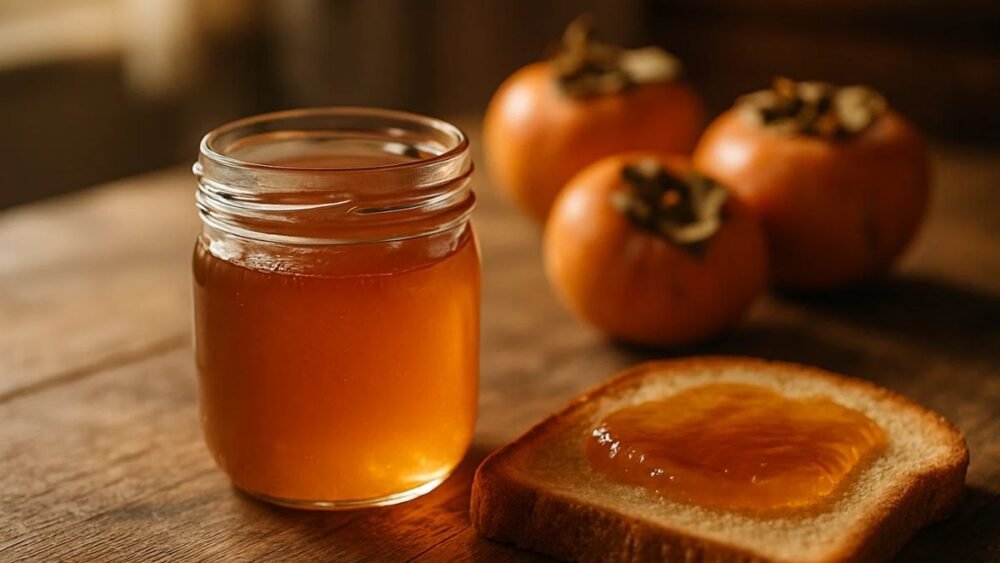
There are louder preserves in the world than persimmon jelly.
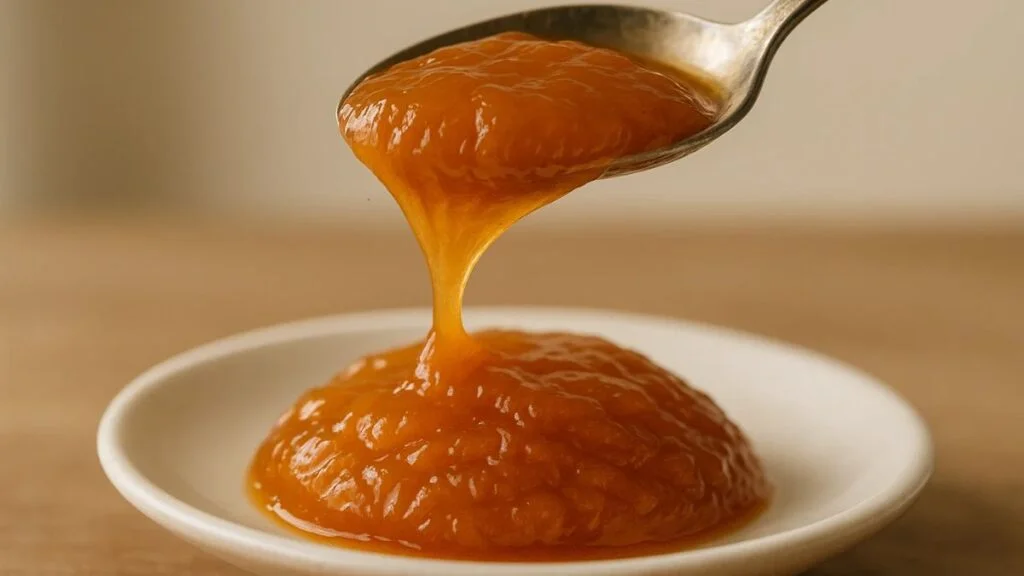
Strawberry announces itself. Grape is familiar, dependable, almost automatic. Persimmon jelly, though, feels quieter—more deliberate. It’s the kind of spread you don’t rush into. It waits. And when you finally open a jar, spread it across warm toast, and watch the light pass through that amber glow, you understand why people still make it the old-fashioned way.
I didn’t grow up eating persimmon jelly. Most people didn’t. It tends to appear later in life—after a tree drops too much fruit at once, or when someone hands you a bag of overripe persimmons and says, “You’ll figure something out.”
That’s usually how this recipe begins.
This guide isn’t rushed. It’s not clipped or mechanical. Instead, it walks you through persimmon jelly the way an experienced home cook would—step by step, with context, gentle warnings, and a few hard-earned lessons along the way.
By the end, you’ll know not just how to make persimmon jelly, but why each step matters—and how to adapt it confidently to your kitchen, your taste, and your pantry.
Jump To
What Persimmon Jelly Actually Is (And What It Isn’t)
At its core, persimmon jelly is a clear fruit preserve made from strained persimmon juice, sugar, and acid—usually lemon juice—cooked until it reaches a soft but reliable gel.
That clarity is the point.
Unlike persimmon jam or butter, jelly contains no pulp. No fiber. No fruit pieces. What you’re left with is a smooth, glossy spread that sets cleanly and melts evenly on warm bread.
If you’re deciding between different types of preserves, this quick comparison helps:
| Preserve Type | Texture | Contains Pulp? | Look & Feel |
|---|---|---|---|
| Jelly | Firm, smooth | No | Clear, glassy |
| Jam | Soft, spreadable | Yes | Thick, opaque |
| Preserves | Chunky | Yes (large pieces) | Rustic |
| Butter | Dense, silky | Pureed | Matte |
If you love elegance over texture—jelly wins every time.
Why Persimmon Jelly Is Making a Quiet Comeback
There’s a reason traditional fruit jellies are showing up again in home kitchens.
People are slowing down.
They’re canning again. Cooking seasonally. Making things not because they’re trendy, but because they feel grounding. Persimmon jelly fits right into that rhythm, much like other fall preserves or nostalgic desserts such as candy cane pie or old-school baked treats that resurface every holiday season.
Persimmons themselves are also getting a second look—especially among home cooks who are experimenting with fruit beyond apples and berries.
And once you taste a well-made persimmon jelly, it sticks.
Choosing the Right Persimmons (This Step Decides Everything)
This is where many first-time jelly makers go wrong—not because they rush, but because they don’t realize how different persimmons can behave.
The Two Varieties That Matter Most
Fuyu persimmons
- Non-astringent
- Mild, honeyed sweetness
- Firm when ripe
- Very beginner-friendly
Hachiya persimmons
- Deep, complex flavor
- Extremely astringent when unripe
- Must be very soft before use
- Excellent jelly—if you’re patient
If you bite into a persimmon and your mouth instantly dries out, it isn’t ready. Don’t cook it. Don’t “hope it improves.” It won’t.
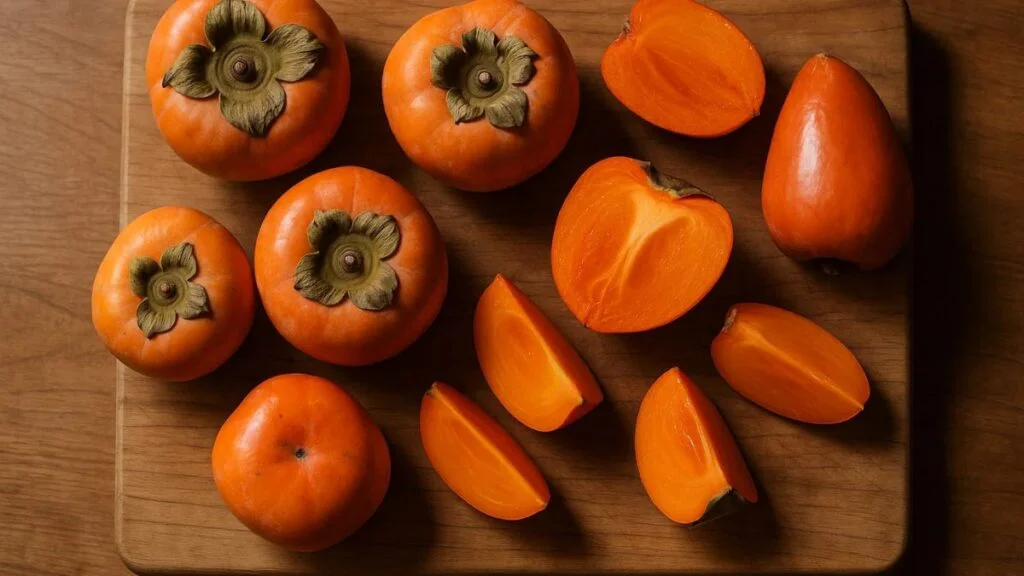
How to Tell Persimmons Are Jelly-Ready
Look for:
- Deep orange to reddish skin
- Very soft flesh (especially Hachiya)
- No bitterness when tasted
If there’s even a hint of astringency, wait another day or two. Jelly magnifies flavor—for better or worse.
Ingredients for a Classic Persimmon Jelly Recipe
This is a traditional stovetop method that prioritizes clarity, balance, and consistency.
Basic Ingredients
- 4–5 pounds ripe persimmons
- 4 cups water
- 4 cups granulated sugar
- ¼ cup fresh lemon juice
Optional but helpful
- 1 packet powdered pectin
You can make persimmon jelly without pectin. Many people do. But if this is your first attempt—or if you want insurance against a runny set—pectin removes a lot of stress.
Tools You’ll Actually Use (No Fancy Gear Required)
You don’t need specialty equipment, but a few basics make the process smoother:
- Large stockpot
- Fine mesh strainer or cheesecloth
- Wooden spoon
- Candy or jelly thermometer (optional, but useful)
- Clean glass jars with lids
If you plan to store the jelly beyond a few weeks, a water bath canner becomes important. Otherwise, refrigeration works just fine.
Step-by-Step: How to Make Persimmon Jelly at Home
This is where the process becomes almost meditative.
Step 1: Prepare the Fruit
Wash the persimmons, remove stems, and chop them roughly. There’s no need to peel—skins won’t pass through the strainer.
Step 2: Simmer to Release the Juice

Combine chopped fruit and water in a large pot. Bring to a gentle boil, then lower the heat and simmer for about 30 minutes.
The persimmons should collapse completely, releasing their color and aroma.
Step 3: Strain Slowly (Patience Matters Here)
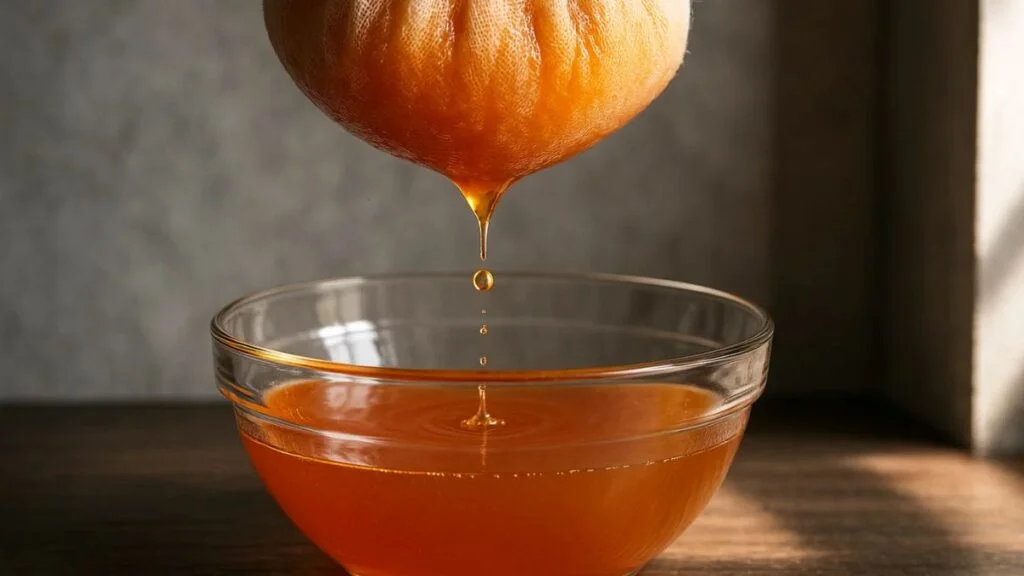
Pour the mixture into a cheesecloth-lined strainer over a bowl. Let it drip naturally.
Resist the urge to press.
Pressing forces pulp through and clouds the jelly. Clear jelly starts here—or it doesn’t happen at all.
Step 4: Measure the Juice
You’ll need 4 cups of strained juice. If you’re short, add a little water.
Step 5: Cook the Jelly
Return the juice to the pot. Add sugar and lemon juice. Bring to a rolling boil, stirring constantly.
If using pectin, add it according to package directions.
Step 6: Test for Set
Your jelly is ready when:
- It reaches 220°F (104°C)
- Or it wrinkles when nudged on a cold plate
Step 7: Jar and Seal

Pour hot jelly into sterilized jars, leaving ¼-inch headspace. Seal.
For long-term storage, process in a boiling water bath for 10 minutes.
Why Lemon Juice Isn’t Optional
Persimmons are naturally low in acid.
Lemon juice:
- Activates pectin
- Balances sweetness
- Improves shelf safety
Skipping it often leads to jelly that refuses to set—or tastes flat and sugary instead of bright.
Making Persimmon Jelly Without Pectin (Yes, It’s Possible)
This works—but it’s less predictable.
Persimmons contain some natural pectin, especially when slightly underripe. Without added pectin, expect:
- Longer cooking times
- Softer set
- Greater reliance on temperature control
If you’re comfortable with traditional jelly-making, go for it. If not, pectin saves frustration.
Low-Sugar and Dietary Variations
Low-Sugar Persimmon Jelly
- Use low-sugar pectin
- Reduce sugar by up to 50%
- Expect a gentler set
Vegan & Gluten-Free
Good news: classic persimmon jelly already qualifies as both.
Common Problems (And How to Fix Them)
“My Jelly Is Runny”
Most common causes:
- Not cooked long enough
- Insufficient acid
- Too much juice relative to sugar
Fix: Reheat and cook longer, or dissolve a small amount of pectin and add it.
“My Jelly Turned Cloudy”
- Juice was pressed
- Sediment slipped through
Clarity is decided at the straining stage. There’s no fixing it later.
Storage, Shelf Life, and Freezing
- Sealed jars: Up to 12 months
- Opened jars: 3–4 weeks refrigerated
- Frozen: Up to 6 months (texture softens slightly)
Creative Ways to Use Persimmon Jelly (Beyond Toast)

This is where persimmon jelly quietly shines.
- Glaze for roasted chicken or pork
- Swirled into oatmeal or yogurt
- Paired with soft cheeses
- Thumbprint cookie filling
- Holiday gift jars
It plays especially well alongside fall dishes and cozy recipes, much like spreads served with sweet potato brown rice salad or rustic baked goods.
Why This Recipe Works
- Uses properly ripened fruit
- Balances sugar and acid
- Clear guidance for pectin and no-pectin methods
- Prioritizes clarity and flavor
Simple. Traditional. Reliable.
First-Time Jelly Maker Tips (From Experience)
- Measure carefully
- Keep heat consistent
- Don’t rush the set
- Label jars with dates
Preserving is science—but also instinct.
Does persimmon jelly taste overly sweet?
No. Lemon juice keeps it balanced.
Can I mix persimmons with other fruits?
Yes. Apple and pear boost pectin and complement flavor.
Is persimmon jelly safe for water bath canning?
Yes—when properly acidified and processed.
Final Thoughts: Why Persimmon Jelly Is Worth Making

Persimmon jelly doesn’t rush you.
It asks for patience. For attention. For trust in small details. And in return, it gives you something rare—a preserve that feels both nostalgic and quietly refined.
If you’ve never made jelly before, this is a surprisingly forgiving place to start.
And once you do, you’ll notice something interesting.
You’ll start looking at that golden jar not just as something to eat—but as proof that slowing down still has a place in the kitchen.
If you enjoyed this article, don’t forget to follow and subscribe for more health tools, recipes, and news!

Easy Persimmon Jelly (Old-Fashioned & Crystal Clear)
Equipment
- Large stockpot
- Fine mesh strainer or cheesecloth
- Large heatproof bowl
- Wooden Spoon
- Candy or jelly thermometer (optional)
- Sterilized glass jars with lids
- Water bath canner (optional, for long-term storage)
Ingredients
- 4 –5 pounds ripe persimmons
- Fully soft and non-astringent
- 4 cups water
- 4 cups granulated sugar
- ¼ cup fresh lemon juice
- 1 packet powdered pectin optional, but recommended for beginners
Instructions
Prepare the persimmons
- Wash the persimmons, remove stems, and roughly chop them. No peeling needed—the skins won’t affect the final jelly.
Simmer to extract juice
- Add the chopped persimmons and water to a large pot. Bring to a gentle boil, then reduce heat and simmer for about 30 minutes, stirring occasionally, until the fruit breaks down completely.
Strain slowly for clarity
- Pour the mixture into a cheesecloth-lined strainer set over a bowl. Let the juice drip naturally. Do not press—this keeps the jelly clear.
Measure the juice
- Measure out 4 cups of persimmon juice. If needed, add a small amount of water to reach the correct volume.
Cook the jelly
- Return the juice to the pot. Add sugar and lemon juice. Bring to a rolling boil, stirring constantly. If using pectin, add it according to package instructions.
Test for doneness
- Continue boiling until the jelly reaches 220°F (104°C) or passes the wrinkle test on a cold plate.
Jar and seal
- Pour the hot jelly into sterilized jars, leaving ¼-inch headspace. Seal with lids. Process in a water bath for 10 minutes if storing long-term, or let cool and refrigerate.
Notes


- Fully ripe persimmons are essential—unripe fruit will make the jelly bitter and unpleasant.
- Lemon juice is not optional; it helps the jelly set and balances sweetness.
- For a softer, traditional set, you can skip pectin, but expect longer cooking time.
- Proper straining is the key to clear, beautiful jelly—patience here pays off.

Muhammad Ahtsham is the founder of EatLikeFit.com and a nutrition researcher dedicated to healthy weight management. He provides practical, science-backed advice on high-protein diets and affordable meal planning to help readers achieve their fitness goals simply and effectively.