There’s a certain romance attached to sourdough bread. Maybe it’s the crackling crust, maybe it’s the idea of wild yeast quietly doing its thing on your kitchen counter, or maybe it’s just the smell—warm, slightly tangy, unmistakably real. For a long time, I believed sourdough belonged to people with linen‑lined baskets, Dutch ovens heavy enough to double as gym equipment, and the kind of patience that allows you to plan meals three days in advance.
Then real life stepped in.
Jobs. Kids. Errands. Emails at midnight. Suddenly, the idea of babysitting dough felt… ambitious.
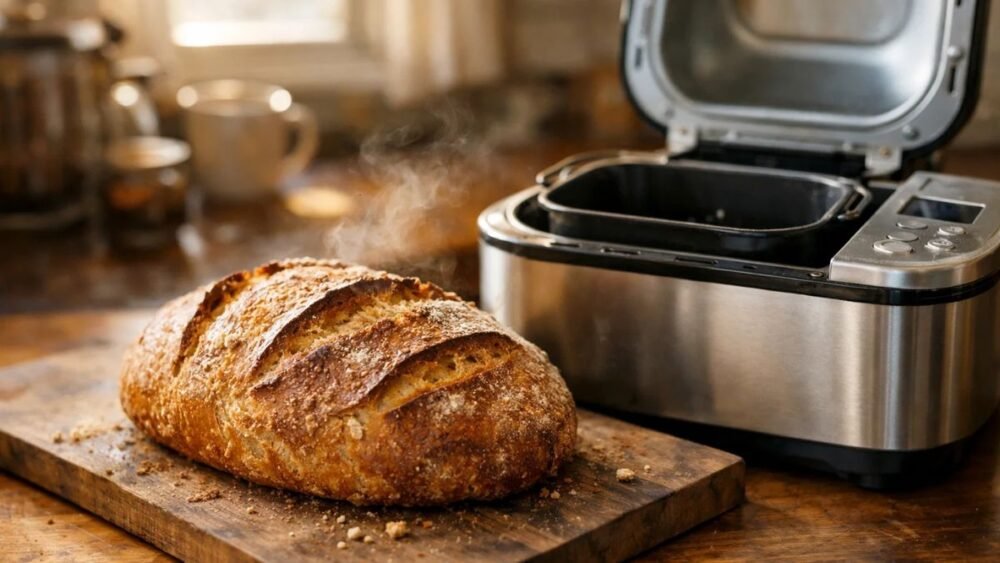
That’s when the bread machine entered the story. Not as a shortcut, but as a translator—taking an old, intimidating process and turning it into something manageable, repeatable, and honestly enjoyable.
This beginner‑friendly sourdough bread machine recipe is for people who love good bread but don’t want their entire day to revolve around it. If you have an active sourdough starter and a basic bread machine, you’re already most of the way there.
Let’s slow down, talk it through, and bake something you’ll actually want to make again.
Jump To
Why Sourdough Feels So Intimidating (and Why It Doesn’t Have to Be)
Ask ten people why they haven’t tried sourdough and you’ll hear the same themes:
- “It’s too complicated.”
- “I don’t understand hydration ratios.”
- “I don’t have time to stretch and fold dough all day.”
- “I’m scared I’ll mess it up.”
And honestly? Those fears aren’t unreasonable.
Traditional sourdough baking can be technical. It often involves long fermentation windows, temperature control, hands‑on dough handling, and a fair amount of trial and error. That’s beautiful in its own way—but it’s not accessible to everyone.
Here’s the part that doesn’t get said often enough:
Sourdough isn’t difficult because it’s sourdough. It’s difficult because of the method.
Change the method, and suddenly everything feels lighter.
A bread machine removes several barriers at once. It kneads consistently. It keeps the dough warm. It manages the timing. Instead of juggling variables, you get to focus on the fundamentals: starter strength, dough texture, and flavor.
That’s where real learning happens.
Serve This: Bobby Flay Pizza Dough Recipe
What Makes Bread Machine Sourdough Different?
A sourdough bread machine recipe uses natural wild yeast from an active starter instead of commercial yeast. The bread machine takes care of the mechanical work—mixing, kneading, proofing, and baking—while fermentation still happens naturally.
You’re not sacrificing the soul of sourdough. You’re simply changing how the dough gets there.
What You Still Get
- Natural fermentation
- Improved digestibility
- Better mineral absorption
- Mild, complex sourdough flavor
- Chewy crumb with structure
What You Skip
- Stretch‑and‑fold schedules
- Shaping stress
- Proofing baskets
- Oven steam setups
- Guesswork timing
Think of it as sourdough with training wheels—except those wheels don’t come off unless you want them to.
Is Using a Bread Machine “Cheating”?
No.
Baking has always evolved with technology. At one point, commercial yeast itself was controversial. So were stand mixers. So were temperature‑controlled ovens.
A bread machine is just another tool. Used poorly, it produces mediocre bread. Used well, it produces something genuinely satisfying.
For beginners especially, the controlled environment of a bread machine can actually increase success, not diminish it. Fermentation is sensitive. Temperature swings matter. Consistency matters. Bread machines quietly handle those variables while you learn.
And learning is the point.
Ingredients: Simple, Forgiving, and Purposeful
This recipe is intentionally minimal. No exotic flours. No complicated math. Just ingredients you can understand.
Core Ingredients
- 1 cup (240 g) active sourdough starter (100% hydration)
- ¾ cup (180 ml) filtered water
- 3 cups (360 g) bread flour
- 1½ teaspoons sea salt
- 1 tablespoon olive oil (optional, for a softer crumb)
If you’re new to sourdough, let’s pause on one important term.
Serve This: Pan de Muerto Recipe
What “Active Starter” Actually Means

Your starter should:
- Be fed within the last 4–8 hours
- Show visible bubbles
- Have doubled (or close to it)
- Smell pleasantly tangy, not harsh or alcoholic
If your starter looks sleepy, feed it again and wait. Sourdough bread is only as strong as the culture behind it.
Ingredient Variations (Without Breaking the Recipe)
Once you understand the base, small tweaks become easy.
| Ingredient Swap | What Changes |
|---|---|
| Bread flour → All‑purpose | Slightly softer crumb |
| Olive oil → Butter | Richer flavor |
| Water → Milk | Tender texture |
| 20% whole wheat flour | Earthier taste |
| Add seeds | More texture and nutrition |
Start simple. Experiment later.
Step‑by‑Step: Easy Sourdough Bread Machine Method
This is where the intimidation usually peaks. Let’s take it one calm step at a time.
Step 1: Prep the Starter
Before you touch the bread machine, check your starter.
If it looks lively and smells good, you’re ready.
If not, feed it and wait. This one decision determines 80% of your results.
Step 2: Load the Bread Machine

Unless your manufacturer says otherwise, add ingredients in this order:
- Water
- Sourdough starter
- Olive oil (if using)
- Flour
- Salt (away from liquids)
This order protects fermentation and ensures proper mixing.
Step 3: Choose the Right Cycle
Select:
- Basic or White Bread cycle
- Medium crust
- 1.5 lb loaf size (or closest option)
Avoid rapid or express cycles. Sourdough needs time, even in a machine.
Step 4: Watch the First Knead (Don’t Skip This)

About 5–10 minutes into kneading, lift the lid and look.
You’re aiming for dough that:
- Forms a cohesive ball
- Feels soft and slightly tacky
- Pulls cleanly from the sides
Too dry? Add 1 tablespoon water.
Too wet? Add 1 tablespoon flour.
This tiny adjustment often makes the difference between “okay” bread and “why is this so good?” bread.
Serve This: Pumpkin Brown Sugar Muffins
Step 5: Bake and Cool
When the cycle finishes:
- Remove the loaf immediately
- Let it cool on a wire rack at least one hour
Cutting too early traps steam and creates a gummy crumb. Patience here pays off.
What This Bread Tastes Like (Realistically)
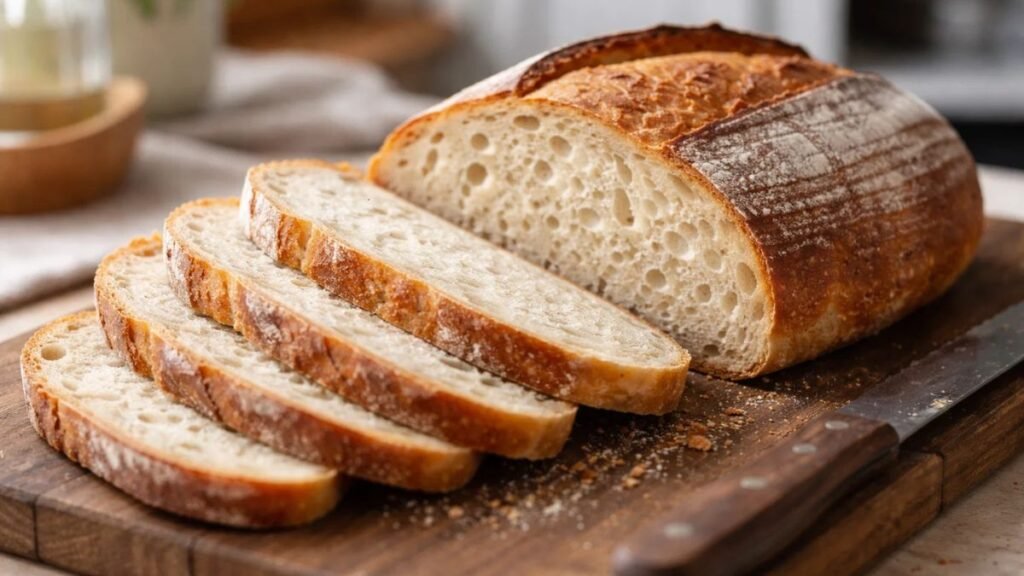
This isn’t aggressively sour San Francisco‑style bread. And that’s a good thing.
Expect:
- Gentle tang
- Even, soft crumb
- Chewy bite without heaviness
- Golden crust
It’s the kind of bread you reach for daily—for toast, sandwiches, eggs, or a late‑night slice with butter.
Subtle. Reliable. Comforting.
Common Problems (and Honest Fixes)
“My Bread Didn’t Rise Much”
Possible reasons:
- Starter wasn’t strong enough
- Kitchen was too cold
- Flour was old
Fix: Feed your starter twice before baking and avoid quick cycles.
“The Loaf Is Dense”
Likely causes:
- Too much flour
- Dough too dry
- Under‑fermentation
Fix: Add a little more water and monitor the dough texture early.
“It Tastes Too Sour”
This happens when:
- Starter is overripe
- Fermentation runs too long
Fix: Use starter earlier after feeding or shorten proofing time.
Bread Machine vs Traditional Sourdough (Side‑by‑Side)
| Feature | Bread Machine | Traditional |
| Hands‑on time | Minimal | High |
| Skill level | Beginner | Intermediate–Advanced |
| Equipment | One machine | Multiple tools |
| Flavor | Mild, balanced | Deeper tang |
Neither is better universally. One is simply more approachable.
Is Bread Machine Sourdough Actually Healthy?
Compared to most store‑bought bread, yes.
Natural fermentation can:
- Improve digestion
- Increase mineral availability
- Lower glycemic response
- Reduce additives and preservatives
You still control the ingredients. That alone matters.
Serve This: Almond Flour Apple Cake
Storage, Shelf Life, and Freezing
- Room temperature: 2–3 days (wrapped)
- Refrigerated: Up to 7 days
- Frozen (sliced): Up to 3 months
Pro tip: Freeze slices individually so you can toast straight from frozen.
Beginner Tips I Wish I’d Known Earlier
- A kitchen scale improves consistency
- Write notes—hydration, results, changes
- Every bread machine behaves a little differently
- Small adjustments beat big changes
Sourdough rewards attention, not perfection.
Quick Recap: Why This Recipe Works
- Beginner‑safe ratios
- Flexible hydration
- Machine‑friendly timing
- No commercial yeast
- Real sourdough flavor
It’s not flashy. It’s reliable.
FAQs
Can I use sourdough discard instead of active starter?
No. Discard lacks the strength needed for proper rise.
Can I delay the bake cycle?
Yes, but only if your starter is strong and predictable.
Will this work in any bread machine?
Most standard models handle it well. Avoid machines limited to ultra‑fast cycles.
Final Thoughts: The Kind of Bread You’ll Actually Bake
This easy sourdough bread machine recipe isn’t about tradition for tradition’s sake. It’s about making good bread possible in real kitchens, on real schedules, by real people.
Once you’ve baked it a few times, confidence sneaks in. You’ll tweak hydration. You’ll add seeds. You’ll try whole grains. Suddenly, sourdough stops feeling mysterious and starts feeling familiar.
And that’s when you know it worked.
The best sourdough isn’t the most complicated loaf on the internet.
It’s the one you bake again.
Serve This: Easy Grinder Salad Recipe
If you enjoyed this article, don’t forget to follow and subscribe for more health tools, recipes, and news!
Easy Sourdough Bread Machine Recipe (Beginner-Friendly)
Equipment
- Bread Machine
- Measuring Cups
- Measuring spoons
- Kitchen Scale
- Cooling rack
Ingredients
- 1 cup active sourdough starter 100% hydration, fed within 4–8 hours
- ¾ cup water Filtered, room temperature
- 3 cups bread flour
- 1½ teaspoons sea salt
- 1 tablespoon olive oil Optional, for softer crumb
Instructions
Step 1:
- Feed your sourdough starter 4–8 hours before baking until it is bubbly, doubled in size, and smells mildly tangy.
Step 2:
- Add ingredients to the bread machine pan in this order: water, sourdough starter, olive oil (if using), flour, then salt. Keep salt away from liquids.
Step 3:
- Select the Basic or White Bread cycle, medium crust, and 1.5 lb loaf size (or closest setting). Avoid quick or rapid cycles.
Step 4:
- During the first 5–10 minutes of kneading, check the dough. It should form a soft, slightly tacky ball.
- If dry, add 1 tablespoon water.
- If wet, add 1 tablespoon flour.
Step 5:
- Allow the bread machine to complete the full cycle. Once finished, remove the loaf immediately.
Step 6:
- Cool the bread on a wire rack for at least 1 hour before slicing to prevent a gummy texture.
Notes
- Do not use sourdough discard; active starter is required for proper rise.
- Bread machine models vary—always monitor the first knead.
- For more sour flavor, allow a slightly longer fermentation.
- Bread slices freeze well for up to 3 months.

Muhammad Ahtsham is the founder of EatLikeFit.com and a nutrition researcher dedicated to healthy weight management. He provides practical, science-backed advice on high-protein diets and affordable meal planning to help readers achieve their fitness goals simply and effectively.